Rob on Renos

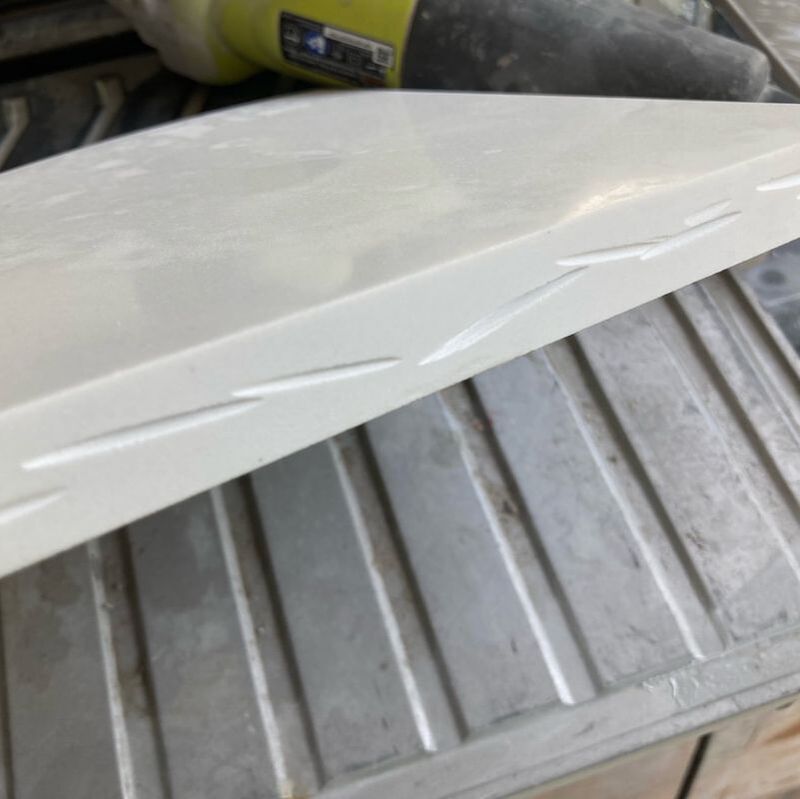
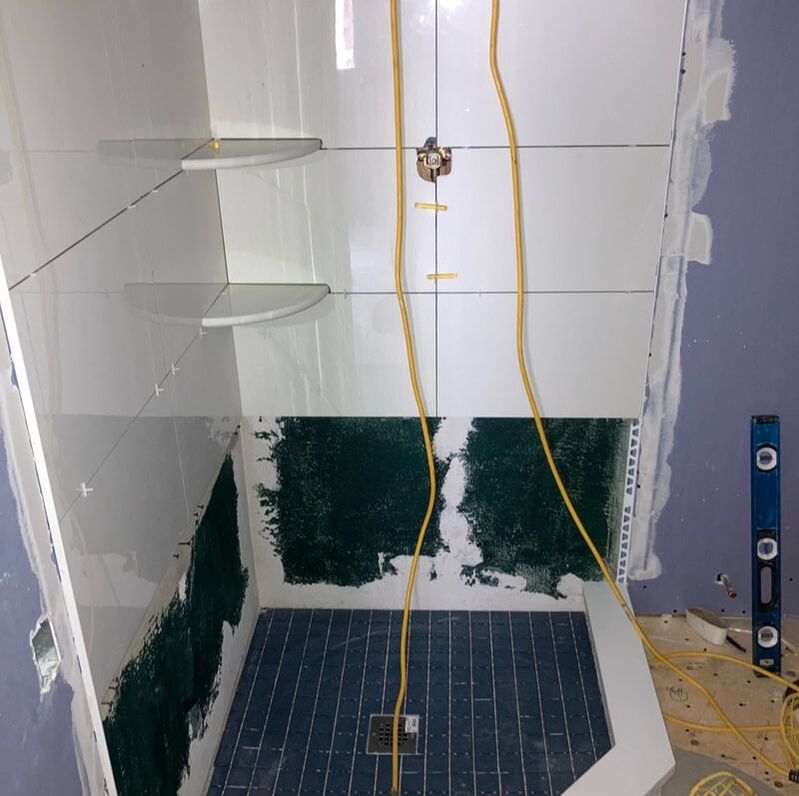
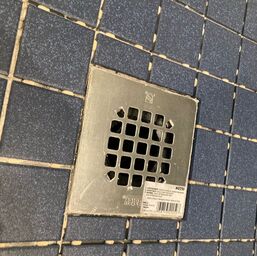 When it comes to showers, details matter. Whenever I cut the tiles around a shower drain, I use a diamond file to put a small radius around the edges. This provides a nice finished edge and ensures that you don't cut your toes! Many homeowners want to have corner shelves installed in their new shower. When installing these, I always take an extra step to ensure that they are securely bonded to the wall. As pictured below, I cut grooves into the back sides of the shelves. This allows the thinset mortar to better adhere to the shelf and therefore the wall. Another tip for shower shelves is to install them at a slight downward angle. This enables the water to shed away from the wall, preventing pools on the shelves.
0 Comments
I have heard horror stories from many homeowners about their experiences with companies and individuals they have hired to complete home improvement projects. I have also been called in to fix the shoddy workmanship after the fact. Please, please follow these five tips when having work done on your home:
1) Always ask for proof of prior work and the ability to connect with prior customers. 2) Check with the Better Business Bureau to determine if there is a history of problems with the company or individual. 3) Find out what type of insurance they carry. Do they have liability insurance? Are they covered by WSIB? 4) Get multiple quotes and remember that cheaper is not always better. A price that is significantly lower than other quotes could indicate the use of sub-standard materials, cutting corners or a general lack of experience which will yield poor results. 5) Never pay someone all of the money upfront or until all work has been completed. Stone porches are beautiful but over time, water can leak in under the mortar during the freeze-thaw cycles and lift up the stones. However, they can be redone, often using the existing stones (if they are carefully removed). Using the jackhammer, I was able to get underneath the stones and pop them off of the underlaying concrete porch. As you can see in the second picture, I am relaying the stone using mortar. When finished, it will look as good as it did when it was originally installed. 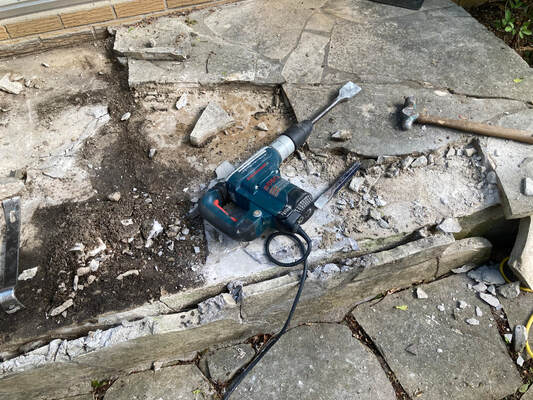  Demolishing a wall can be intimidating. As the saying goes, the key is to tackle it one bite at a time. Visit our facebook page to watch Rob explain this in a video. https://www.benzingerhomeimprovement.ca/robonrenos 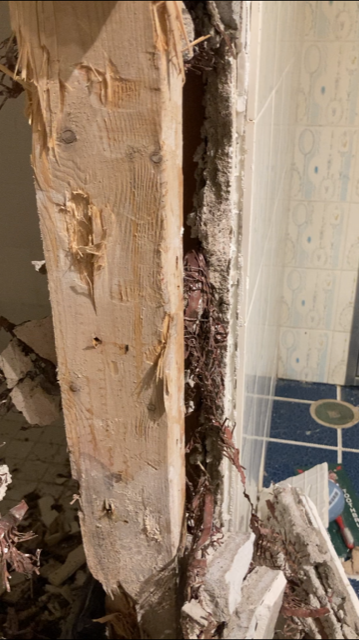 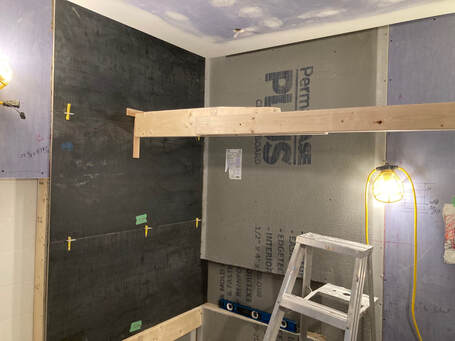 Large format tiles are tricky to work with and quite heavy. Only people with tiling experience should attempt to install them.
In order to prevent the tile from moving away from the wall (due to the weight), I needed to apply some pressure to the tile overnight until the thinset hardened. To create a brace, I screwed together a scrap 2x4 and 2x6 of a length that was slightly smaller than the distance between the two walls. I used a shim between the tile and the brace to create the needed, steady pressure on the tile. 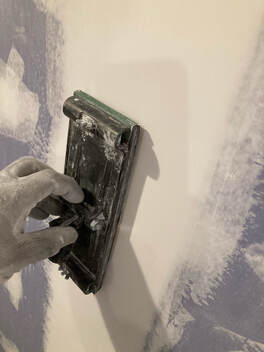 Many people tackle small drywall projects on their own but are not really sure how to properly prepare the area for paint. After three coats of compound, use a block plane with 80 grit sandpaper to smooth and flatten the high spots of the compound. Then, use a sanding block with 120 grit sandpaper to ensure the edges of the compound are nicely feathered into the drywall paper itself. Sanding should only begin after the third coat of compound has been applied - you should not be sanding in between coats. This process will yield a smooth wall.
 If you ever find yourself in the position of needing to hang drywall on a ceiling by yourself, this trick will make you feel like Hercules.
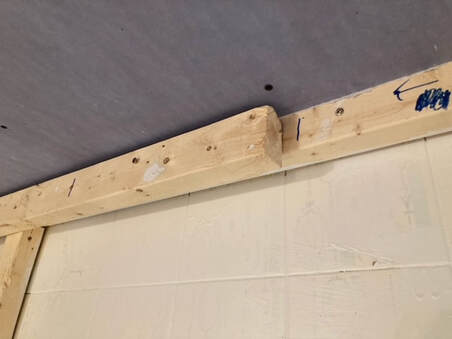
Temporarily screw a helper board to the wall about one inch down from the ceiling. You can see this at the top of the photo. Insert the sheet of drywall on the top of the helper board (pushed against the wall). You can then hold and screw the opposite side of the sheet of drywall and work your way back. 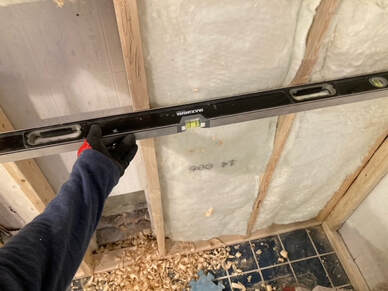 Obviously, you want your new wall to be flat. But, what if one or more of the studs is bowed out? Ignore this at your peril. If you don't fix it, you will end up with a wall that is uneven. This is particularly problematic if you are going to be tiling the wall and even more so if you are using large format tiles (which leave little room for forgiveness).
You need to hand plane the bowed stud, checking for flatness with your level as you go. Addressing the problem at this stage will save you grief later. 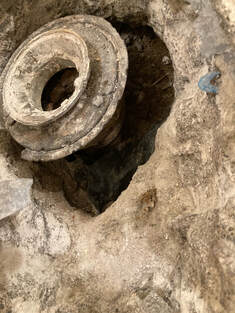 I came across this rather unusual style of fitting when gutting a bathroom in an older home. It was embedded in concrete and attached to the cast iron drain. I had to chisel approximately 8 inches down using an electric hammer drill so that the plumber could remove and properly connect a new-style ABS drain. Bathrooms in older homes often have concrete and steel mesh behind the tiles (against the 2x4s). This makes demolition a challenge but you tackle it as you would an elephant - one bite at a time. Use your pry bar and keep working at it. Leverage is your friend! 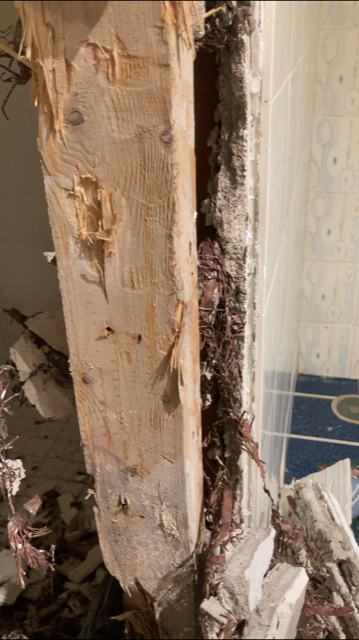 |
AuthorI am an experienced craftsman with a passion and talent for home improvement. 
|

Benzinger Home Improvement, Ltd.
|
"We are fortunate to know such a talented craftsman especially in these times when they are very hard to find. We recommend Rob wholeheartedly!" "He has a deep understanding of all house renovation projects and I have yet to find one he can't do." "Robs attention to detail is what pulled this project together. His knowledge and overall care shows in his workmanship. I highly recommend him for your projects as you will not be disappointed." "We truly appreciated his reliability and punctuality, and his overall work ethic. It was a pleasure working with him as he is very knowledgeable, organized, efficient, calm, and an independent, confident worker with a great deal of experience under his belt. Rob will be the one we choose for our future renovation projects. We highly recommend Benzinger Home Improvement." Site powered by Weebly. Managed by Web Hosting Canada
|
 RSS Feed