|
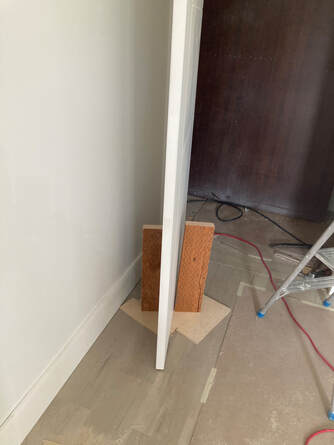
When you are installing a solid core door, use a door buck to aid in the installation. This holds the door for you when you are screwing it to the jamb and to help you when routering the hinges.
0 Comments
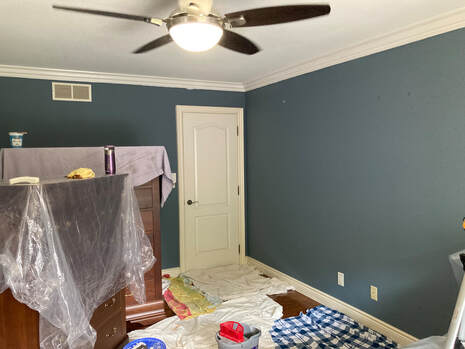
When painting a bedroom that has crown mouldings, you want to start from the top to the bottom. This means starting with the ceilings first, followed by the crown mouldings, the walls, and lastly the baseboards. There are a few reasons why you should do this; to ensure that no paint drips onto finished areas if you are painting above it, and doing the edges up to the crown mouldings from the walls it gives it a finished look.
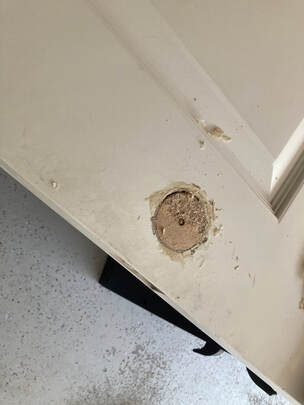
In this bathroom renovation, the customer currently had a regular door but wanted a pocket door instead. The existing hole in the door did not work with the new latch kit and part of the hole would have shown. As a solution to this, Rob glued a plug in the existing hole and made a new hole in the correct location to accommodate the new latch kit.
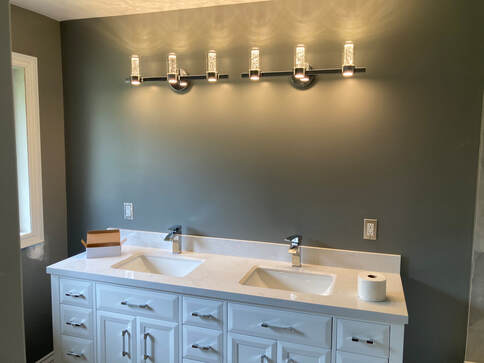
In this full bathroom renovation, there was only one electrical outlet originally. Rob added another electrical outlet to the other side of the vanity and relocated the existing one so they were symmetrical to each end of the vanity. When you are figuring out where to place your outlets, you must be careful to account for the height of the backsplash.
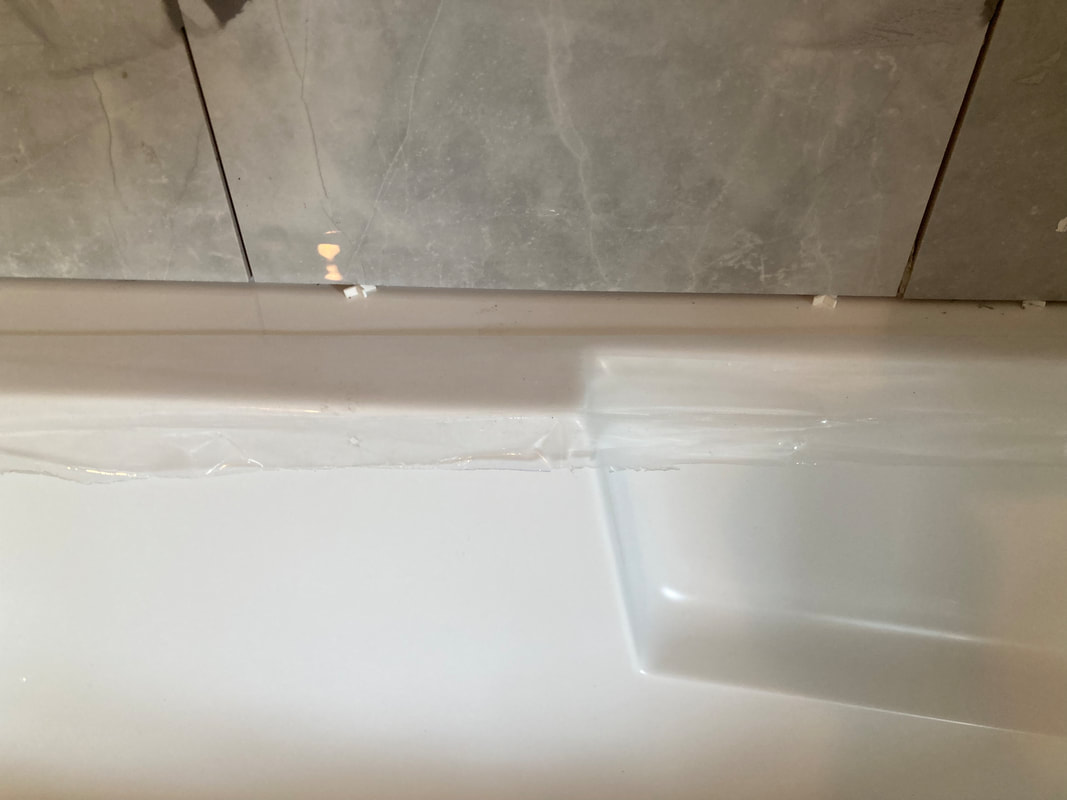
When you are tiling around a tub the first row must have a small space between the tub and the tile. Although the tiles on the wall will not move, the tub will flex. You don’t want the tub to pop the tiles or put pressure on them. Caulking will go in between the tiles and the tub to seal the gap after grouting has dried.
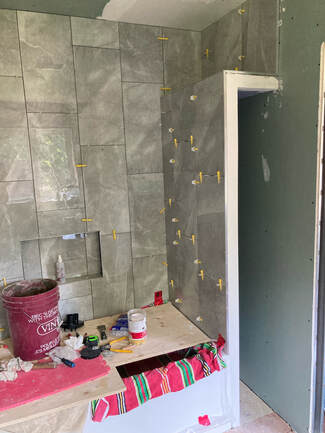
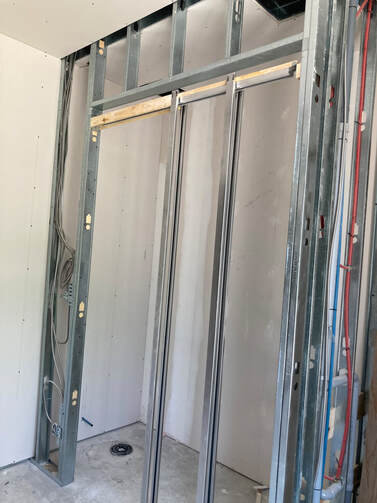
This week I installed a 5ft bathtub. However, the wall was 6ft which left us with a 1ft gap. Instead of leaving that space unused, I put a wall up and added a small closet to utilize the space. Extra room was left up top for some decorative accent pieces.
This week Rob is working on an 8ft pocket door in a commercial building. When installing a pocket door, it is important to plan ahead so that you know where to install the track. You must consider the height of the door, the clearance you want, and how thick the floor is if it has not been installed yet, as you can see here.
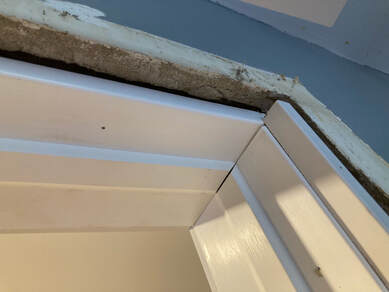
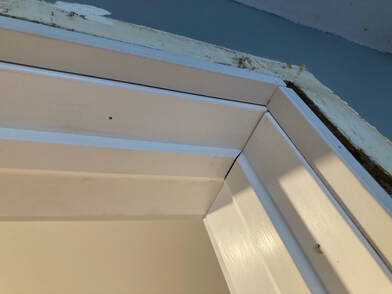
The bottom brackets need to be screwed to the floor, however before you drill you want to ensure that there is no in floor heating. In this situation, I used tap cons and also construction adhesive. Hanging a pre-hung door is not always as easy as pie. Plaster walls in older buildings are roughly 5 and 1/2 inches thick. When you want to install a new door, you may have a problem because most pre-hung doors are only 4 and 9/16 inches wide. The solution is custom-made jam extensions. I was faced with this exact problem this week. The picture on the left shows the gap that needed be covered and the picture on the right shows the new jam extension I made and installed.
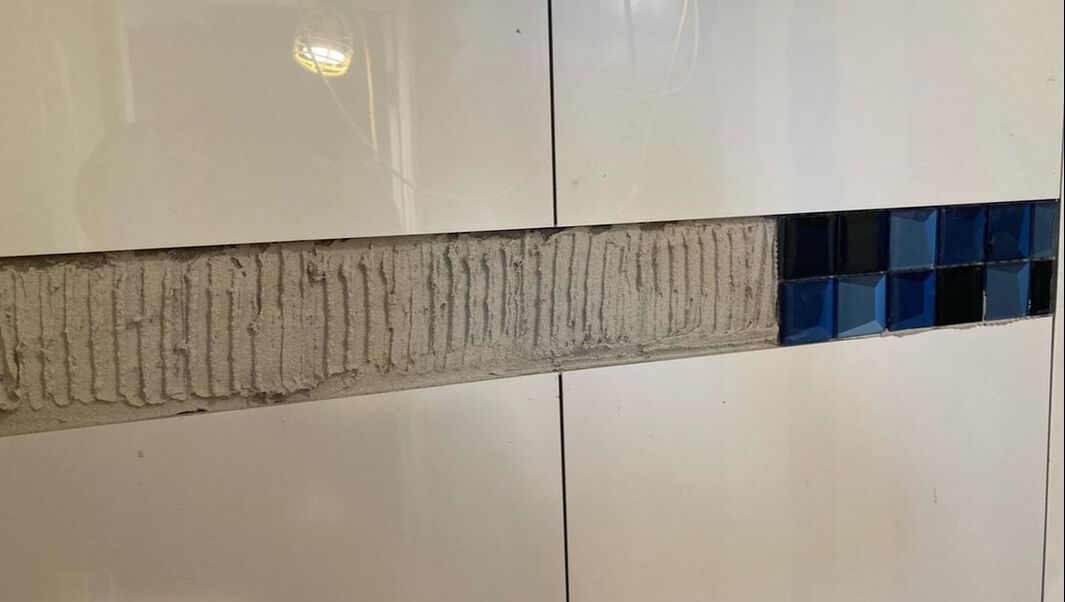
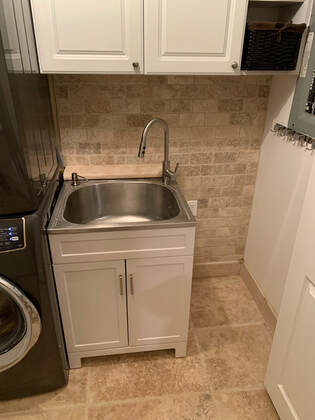 When tiling behind a valance, use an oscillating tool to cut the valance for the thickness of the tile. That way, you will be able to install the tile behind the valance under the cabinet. This is a much better alternative to trying to cut the tile around the valance because it provides a cleaner look. Tile borders bring visual interest to a room but require some planning prior to installation. This is particularly true when, as pictured below, the border tile is much thinner than the wall tile. In order to set the tiles flush, you need to build up the surface evenly with thin-set mortar and let it set overnight. This is an essential step. If you tried to apply a large amount of thin-set mortar all at one time to offset the differential, the tiles would sink unevenly, creating a wavy surface. These extra steps are what create a great finished product and why quicker and cheaper are not always better.
|
AuthorI am an experienced craftsman with a passion and talent for home improvement.
|
|
Benzinger Home Improvement, Ltd.
|
"We are fortunate to know such a talented craftsman especially in these times when they are very hard to find. We recommend Rob wholeheartedly!" "He has a deep understanding of all house renovation projects and I have yet to find one he can't do." "Robs attention to detail is what pulled this project together. His knowledge and overall care shows in his workmanship. I highly recommend him for your projects as you will not be disappointed." "We truly appreciated his reliability and punctuality, and his overall work ethic. It was a pleasure working with him as he is very knowledgeable, organized, efficient, calm, and an independent, confident worker with a great deal of experience under his belt. Rob will be the one we choose for our future renovation projects. We highly recommend Benzinger Home Improvement." Site powered by Weebly. Managed by Web Hosting Canada
|


 RSS Feed
